When the Sky Falls In: Your Emergency Roof Leak Action Plan
A sudden roof leak can be a homeowner’s worst nightmare, a rude awakening to the fragility of the shelter we often take for granted. The relentless drip, drip, drip is more than just an annoyance; it’s a direct threat to your home’s structural integrity, personal belongings, and, perhaps most insidiously, your peace of mind. The potential for escalating water damage looms large, turning a minor inconvenience into a major financial burden if not addressed swiftly.
Understanding the dynamics of a leaking roof and acting decisively in the crucial hours before professional help arrives is paramount; your quick, informed actions can significantly minimize the long-term damage and associated costs. This comprehensive guide provides a step-by-step emergency roof leak action plan, designed to empower you to protect your home and navigate this stressful situation effectively. We’ll cover essential safety precautions, methods for identifying the source of the roof leak, containment strategies to mitigate water damage, and guidance on documenting the damage for your homeowner’s insurance claim.
Furthermore, we’ll explore the possibilities – and inherent risks – of temporary fixes, emphasizing the importance of engaging a qualified roofing contractor for lasting roof repair. Navigating the aftermath of a leaking roof also necessitates understanding the insurance landscape. Documenting shingle damage or issues with flashing repair meticulously is crucial for a successful homeowner’s insurance claim. Remember, most policies cover sudden and accidental damage, but often exclude damage resulting from neglected roof maintenance. Selecting a reputable roofing contractor experienced in working with insurance companies can streamline the claims process and ensure you receive fair compensation for the necessary emergency roof repair. Proactive roof maintenance, including regular inspections, can often prevent these emergencies, saving you considerable stress and expense.
Step 1: Safety First – Avoiding Electrical Hazards and Structural Risks
Before you do anything else, prioritize your safety. Water and electricity are a dangerous combination. Immediately shut off power to any affected areas. This includes lights, ceiling fans, and any electrical outlets near the roof leak. Use extreme caution when walking around the affected area, as the ceiling may be weakened and could collapse. If you suspect significant structural damage or feel unsafe, evacuate the area and call emergency services. According to the Electrical Safety Foundation International (ESFI), water significantly increases the risk of electric shock, making it crucial to disconnect power at the breaker box before approaching a leaking roof.
Beyond electrical hazards, consider the potential for structural compromise. A leaking roof can saturate ceiling materials like drywall or plaster, adding significant weight. This excess weight can cause ceilings to sag or even collapse, posing a serious threat of injury. Look for telltale signs such as bulging, staining, or cracking. In older homes, asbestos may be present in ceiling materials; if disturbed, this poses a severe health risk. If you notice any of these indicators, evacuate immediately and consult with a qualified roofing contractor and, if necessary, an asbestos abatement specialist.
Your homeowner’s insurance claim may cover these assessments, so documenting your concerns is vital. Furthermore, remember that emergency roof repair situations often involve working at heights, either on a ladder or potentially on the roof itself. Unless you are experienced and properly equipped, attempting even a temporary patch can be extremely dangerous. Falls are a leading cause of injury and death in home improvement projects. Instead of risking a fall, focus on containing the water damage from the leaking roof from inside your home and contacting a licensed and insured roofing contractor for professional assistance. Prioritizing safety ensures that you address the roof leak without putting yourself or your family at risk, and it’s a critical first step in managing the situation effectively.
Step 2: Detective Work – Identifying the Leak’s Source
Pinpointing the source of the roof leak is crucial, even if you can’t immediately undertake a roof repair yourself. Inside your home, meticulously inspect ceilings and walls for telltale signs of water damage, such as water stains, discoloration, bubbling paint, or sagging. These indicators often point directly to the area above where the leaking roof originates. However, water can travel along rafters and structural supports, so the actual entry point might be some distance away.
Use a flashlight to get a better view in dimly lit attics or crawl spaces, and consider using a moisture meter to assess the extent of the water damage beyond what’s visually apparent. This early detective work can be invaluable when you file a homeowner’s insurance claim, providing crucial evidence of the leak’s origin and severity. Outside, a careful examination of your roof can reveal the source of the problem. Look for obvious signs of shingle damage, such as missing, cracked, curled, or blistered shingles.
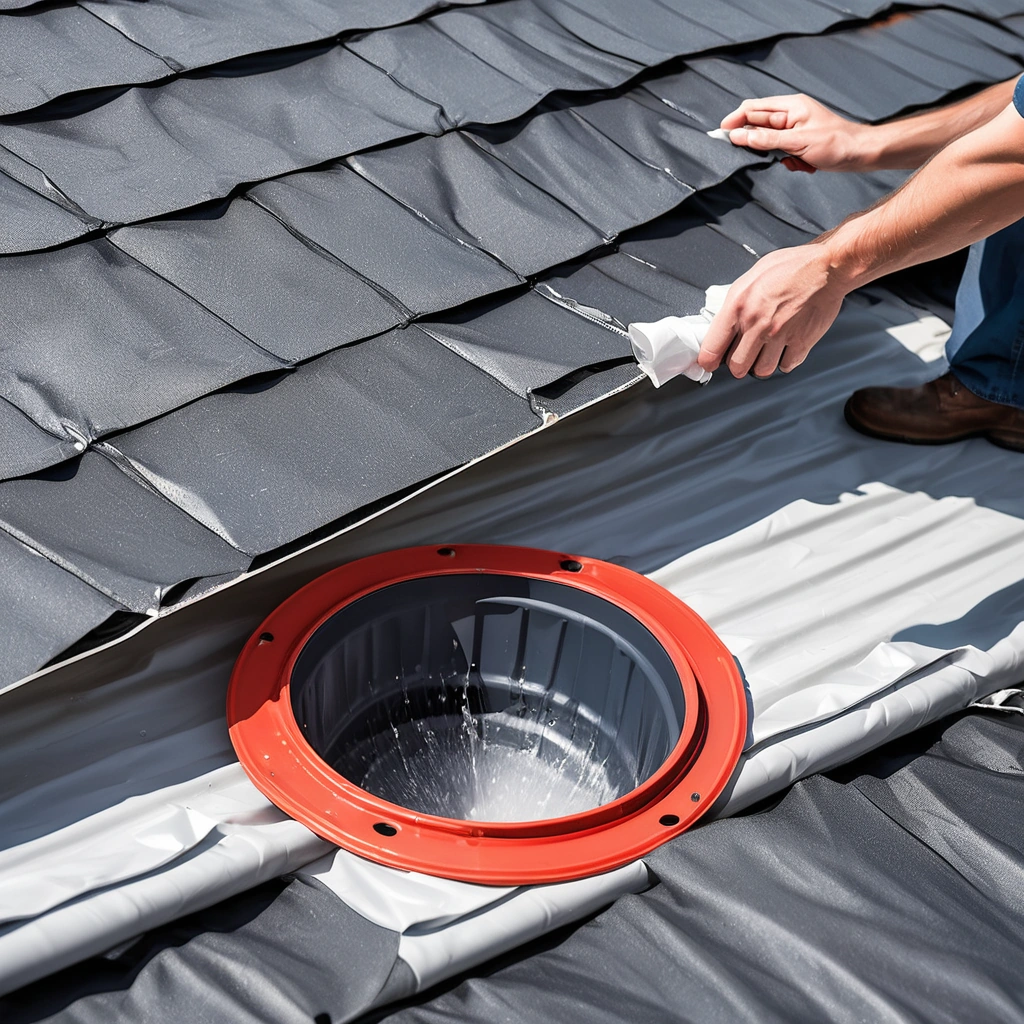
Pay particular attention to areas around roof penetrations like vents, chimneys, and skylights, as these are common weak points. Flashing, the metal strips that seal joints and prevent water intrusion, should be inspected for rust, corrosion, or displacement. According to the National Roofing Contractors Association (NRCA), faulty flashing is a leading cause of roof leaks. Binoculars can be helpful for a safe, ground-level inspection, allowing you to spot potential issues without risking a fall. Remember to note the location of any damage relative to interior leaks; this information will be essential for the roofing contractor you eventually hire for emergency roof repair.
Safety should always be paramount during your investigation. Never go on the roof if it is wet, icy, or if you are not comfortable with heights. Instead, contact a qualified roofing contractor for a professional assessment. A leaking roof can compromise the structural integrity of your home, making certain areas unstable. Furthermore, attempting DIY repairs without proper safety equipment and expertise can lead to serious injury. Documenting your findings with photos and videos is essential for your insurance claim. Be sure to capture both the interior water damage and the exterior shingle damage or flashing repair needs. This detailed documentation will help expedite the claims process and ensure you receive fair compensation for the necessary roof maintenance and repairs.
Step 3: Containment Strategy – Buckets, Tarps, and Controlled Drips
Your immediate goal is to contain the water and prevent it from spreading, mitigating further water damage to your home. Place buckets, trash cans, or large bowls strategically under the most active drips to catch the water. Consider using a variety of container sizes to accommodate different drip rates and locations. For instance, a wide, shallow pan might be best for a broad, diffuse leak, while a tall bucket is better for a concentrated stream.
Cover furniture and valuables in the immediate area with heavy-duty plastic sheeting or tarps. Secure the edges of the plastic to prevent water from running underneath, potentially damaging items you’re trying to protect. Remember, even seemingly waterproof materials can be susceptible to prolonged exposure to moisture, leading to mold growth and costly repairs down the line. This initial containment is not just a temporary fix; it’s a crucial first step in protecting your property and minimizing the scope of your homeowner’s insurance claim related to the roof leak.
If the leak is significant and causing the ceiling to bulge, consider puncturing a small hole in the ceiling with a screwdriver or similar tool directly where the water is pooling. This will create a controlled drip, relieving pressure and preventing a catastrophic ceiling collapse under the weight of the accumulated water. Be prepared for a surge of water when you do this, and have additional containers ready to catch the flow. While this might seem counterintuitive, a controlled release is far preferable to an uncontrolled collapse, which can cause significant structural damage and increase the risk of injury.
Consult with a roofing contractor or emergency roof repair service as soon as possible to assess the structural integrity of the ceiling and roof after this emergency measure. They can advise on necessary repairs and prevent future incidents. Beyond the immediate containment, consider the long-term implications of the roof leak. The moisture can create a breeding ground for mold, which poses health risks and can further damage building materials. According to the EPA, mold can grow on virtually any organic substance, provided moisture and oxygen are present.
Therefore, after addressing the immediate leak, it’s crucial to thoroughly dry the affected area using fans and dehumidifiers. Document all your efforts to contain the leak and dry the area, as this information will be valuable when filing your homeowner’s insurance claim. Furthermore, schedule a professional roof inspection to identify the source of the leak and implement permanent roof repair solutions. Ignoring a leaking roof can lead to extensive and expensive problems, impacting your home’s value and safety.
Step 4: Protecting Your Valuables – Minimizing Loss
The speed and thoroughness with which you protect your valuables directly correlates to the extent of potential long-term water damage. Start by relocating furniture away from the immediate vicinity of the roof leak. Elevate items like sofas, chairs, and tables using wood blocks or plastic risers; this simple step can prevent water from wicking into upholstery and causing irreversible stains or mold growth. Electronics are particularly vulnerable; move televisions, stereos, computers, and other devices to a dry, secure location, ideally covered with plastic sheeting.
Remember that homeowner’s insurance claim adjusters will assess the steps taken to mitigate damages, so proactive measures are crucial. For items too large to move easily, consider covering them entirely with heavy-duty plastic tarps, ensuring the plastic extends beyond the drip line to catch any stray water. Rugs and carpets are highly absorbent and can quickly become breeding grounds for mold and mildew after a roof leak. Roll up area rugs and move them to a dry room, or hang them to allow for air circulation.
For wall-to-wall carpeting, consider using a wet/dry vacuum to extract as much water as possible. Prompt action can significantly reduce the risk of long-term damage, potentially saving you thousands in replacement costs. Artwork is also particularly susceptible to water damage. Remove paintings, prints, and photographs from walls, and store them in a dry, climate-controlled environment. Water can warp canvases, dissolve paints, and cause irreversible damage to paper-based artwork. Consider placing silica gel packets or other desiccants near sensitive items to absorb any residual moisture.
Addressing a leaking roof promptly is not just about immediate containment; it’s about preventing a cascade of problems that can affect your home’s structural integrity and your financial well-being. Beyond the obvious steps of moving valuables, consider the long-term implications of neglected water damage. Mold growth, for example, can necessitate costly remediation and potentially impact your health. Furthermore, water can seep into walls and ceilings, weakening the structure and creating ideal conditions for insect infestations.
By taking proactive steps to protect your belongings and mitigate water damage, and promptly contacting a qualified roofing contractor for roof repair or emergency roof repair, you’re safeguarding your investment and ensuring a healthier living environment. Remember to document all your efforts for your homeowner’s insurance claim, including photos and videos of the affected areas and the steps you’ve taken to minimize the damage from shingle damage or flashing repair caused by the leaking roof.
Step 5: Documenting the Damage – Building Your Insurance Case
Thorough documentation is essential for your homeowner’s insurance claim. Treat this process as building a case, brick by brick, to ensure a fair and comprehensive settlement. Take clear, well-lit photos and videos of the active roof leak, the resulting water damage inside your home (including ceilings, walls, and floors), and any visible damage to your roof’s exterior. Don’t just capture the obvious; zoom in on shingle damage, deteriorated flashing, and any points where water is actively penetrating the structure.
Remember, a picture is worth a thousand words, especially when negotiating with your insurance company. Be sure to include items that show scale, like a ruler next to a crack, to further illustrate the extent of the damage. Document the date and time the roof leak started, and meticulously record all the steps you’ve taken to mitigate the damage. This includes the placement of buckets, the covering of furniture, and any emergency roof repair measures you’ve undertaken.
Save all receipts for any materials you purchase, such as buckets, tarps, plastic sheeting, or even dehumidifiers. These receipts serve as proof of your proactive efforts to minimize further water damage, which can strengthen your homeowner’s insurance claim. Furthermore, maintain a log of all communication with your insurance company, including dates, times, names of representatives, and summaries of conversations. This detailed record can be invaluable if disputes arise later in the claims process. Contact your insurance company as soon as possible to report the claim and understand your coverage.
Many policies have specific timelines for reporting claims, and delaying notification could jeopardize your ability to receive full compensation for the roof repair and associated water damage. Ask your insurance representative for a copy of your policy and carefully review the sections pertaining to roof leaks, covered perils, and deductible amounts. Understanding your policy’s terms and conditions is crucial for navigating the claims process effectively. Be prepared to provide them with all your documentation, including photos, videos, receipts, and your detailed log of events. Finally, consider consulting with a qualified roofing contractor experienced in working with insurance claims. A reputable roofing contractor can assess the damage, provide a detailed estimate for the necessary repairs, and advocate on your behalf with the insurance company to ensure a fair settlement for your leaking roof.
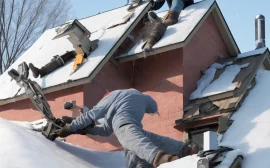
Step 6: Temporary Patching (Proceed with Caution)
Step 6: Temporary Patching (Proceed with Caution). If you can safely access the roof and identify the source of the roof leak, applying a temporary patch can mitigate further water damage until a professional roofing contractor arrives. This is especially crucial in preventing a small leak from escalating into a major emergency roof repair situation. Use roofing tar, waterproof tape specifically designed for roofing applications, or a durable tarp to cover the damaged area. When using a tarp, ensure it extends well beyond the damaged area to effectively divert water away from the leaking roof.
Secure the tarp meticulously with roofing nails or staples, paying close attention to creating a watertight seal to prevent further water intrusion. Remember, this is only a temporary roof repair, and a professional assessment is essential. However, it’s paramount to emphasize the ‘proceed with caution’ aspect. Do not attempt any repairs if you are not comfortable working at heights, if the roof is wet or structurally unsound, or if inclement weather is present. Safety is paramount; falling from a roof can result in severe injury or even death.
Furthermore, improper temporary repairs can sometimes exacerbate the problem, leading to more extensive and costly roof repair down the line. For instance, using the wrong type of sealant can trap moisture and promote rot. Assess your abilities and the risks involved honestly before attempting any temporary fix. If in doubt, prioritize safety and wait for a qualified roofing contractor. Moreover, documenting your temporary patching efforts is crucial for your homeowner’s insurance claim. Take photos and videos of the damaged area before, during, and after applying the temporary patch.
Keep receipts for all materials purchased, as these can be submitted to your insurance company as part of your claim for emergency roof repair. Be transparent with your insurance adjuster about the temporary measures you’ve taken; this demonstrates your proactive approach to minimizing further water damage. However, make it clear that these are temporary measures and a professional assessment is still required to address the underlying issue and ensure long-term roof maintenance and protection against future shingle damage or flashing repair needs.
Step 7: Calling in the Professionals – Licensed and Insured Contractors
Contacting qualified roofing professionals is paramount after addressing the immediate emergency roof leak. Obtain estimates from several contractors, but don’t solely focus on price. Verify their licensing and insurance within your state; this protects you from liability should accidents occur during the roof repair. A reputable roofing contractor will possess not only the technical expertise to accurately assess the extent of the water damage and shingle damage, but also the necessary insurance to cover potential mishaps.
Neglecting this crucial step could leave you financially vulnerable. Beyond licensing and insurance, delve into their reputation. Request references from past clients and meticulously check online reviews on platforms like the Better Business Bureau and Angie’s List. Pay close attention to feedback regarding their communication, punctuality, and the quality of their workmanship. A pattern of complaints about unresolved issues or shoddy repairs should raise a red flag. Remember, a seemingly cheaper option might lead to more extensive, costly repairs down the line.
A leaking roof addressed improperly can exacerbate water damage significantly. Furthermore, a reliable contractor will understand the intricacies of homeowner’s insurance claims related to emergency roof repair. They should be willing to work with your insurance company, providing detailed documentation and advocating on your behalf to ensure a smooth claims process. Inquire about their experience handling insurance claims and their familiarity with common policy stipulations regarding roof maintenance and flashing repair. A contractor experienced in navigating insurance complexities can be an invaluable asset in maximizing your coverage and minimizing your out-of-pocket expenses. Don’t underestimate the value of a solid warranty; it’s your safeguard against future issues stemming from the roof repair.
Common Culprits: Understanding the Causes of Roof Leaks
Roof leaks can stem from a surprisingly diverse range of causes, often interconnected and exacerbated by neglect. Damaged or missing shingles are a common culprit, creating direct pathways for water intrusion. However, seemingly minor issues like improperly installed or corroded flashing around chimneys, vents, and skylights are equally problematic. These vulnerable areas are prime targets for water penetration, often leading to insidious leaks that go undetected for extended periods. Age and weathering play a significant role, gradually weakening roofing materials and causing them to become brittle and prone to cracks.
Regular roof maintenance is therefore paramount. In colder climates, the freeze-thaw cycle presents unique challenges. Ice dams form when melting snow refreezes at the edge of the roof, creating a barrier that traps water and forces it under shingles. This can lead to significant water damage and costly roof repair. Addressing ice damming requires proactive measures such as improving attic insulation and ventilation to minimize temperature differences across the roof surface. Ignoring these preventative steps can result in emergency roof repair scenarios and potentially jeopardize a homeowner’s insurance claim, as insurers often scrutinize claims resulting from preventable conditions.
Beyond the obvious culprits, consider the impact of improper installation or substandard materials. A seemingly flawless shingle installation can be compromised by incorrect nailing techniques or the use of inferior underlayment. Such deficiencies may not be immediately apparent but can manifest as a leaking roof years later. Furthermore, storm damage, including high winds and hail, can cause shingle damage and weaken the roof’s overall integrity, increasing the likelihood of future leaks. Engaging a qualified roofing contractor for regular inspections is a wise investment, allowing for early detection of potential problems and avoiding the disruption and expense of a major roof leak. Proper flashing repair and addressing shingle damage promptly are key to preventing water damage and maintaining the long-term health of your roof.
FAQ: Common Homeowner Concerns About Roof Leaks
Q: How long do I have to file a claim with my homeowner’s insurance? A: The timeframe for filing a homeowner’s insurance claim for a roof leak varies significantly depending on your insurance company’s policies and state regulations. Some policies may require you to file a claim within a matter of days or weeks after discovering the damage, while others offer a more extended period. Failing to adhere to these deadlines could jeopardize your chances of receiving coverage for the roof repair.
It’s crucial to contact your insurance provider immediately after discovering a leaking roof to understand their specific requirements and any applicable deadlines. Document the date you reported the damage and the name of the representative you spoke with, as this information can be valuable if any disputes arise later in the claims process. Q: Will my homeowner’s insurance cover roof leak damage? A: Most homeowner’s insurance policies provide coverage for roof leaks caused by sudden and accidental events, such as severe storms, wind damage that tears off shingles, or damage caused by fallen trees.
These policies are designed to protect homeowners from unforeseen disasters. However, standard policies typically exclude coverage for damage resulting from neglect, lack of roof maintenance, or normal wear and tear. For example, if your roof is 25 years old and develops a leak due to its age, your insurance claim may be denied. Similarly, if you’ve ignored visible shingle damage for an extended period, leading to a more significant water damage issue, your claim could be rejected.
It’s essential to understand the specific terms and conditions of your policy to determine what types of roof leak damage are covered. Q: How much does roof repair typically cost? A: The cost of roof repair can vary widely depending on several factors, including the extent of the damage, the type of roofing materials used (asphalt shingles, tile, metal, etc.), the complexity of the repair, and your geographic location. Minor repairs, such as replacing a few damaged shingles or addressing a small flashing repair around a chimney, might cost a few hundred dollars.
However, more extensive damage, such as widespread shingle damage, significant leaking roof issues requiring structural repairs, or emergency roof repair after a storm, can easily run into thousands of dollars. Always obtain multiple estimates from qualified roofing contractors to compare prices and services. Be wary of unusually low bids, as they may indicate substandard work or materials. A reputable roofing contractor will provide a detailed breakdown of the repair costs, including labor, materials, and any necessary permits.
Q: What proactive roof maintenance steps can prevent future leaks and insurance claim hassles? A: Preventative roof maintenance is key to avoiding costly roof repairs and potential disputes with your insurance company. Regular inspections, ideally twice a year (spring and fall), can help identify and address minor issues before they escalate into major problems. Clear your roof of debris, such as leaves and branches, which can trap moisture and accelerate deterioration. Inspect shingles for signs of damage, such as cracking, curling, or missing granules.
Address any flashing repair needs promptly, as compromised flashing around chimneys, vents, and skylights is a common source of leaks. Consider hiring a professional roofing contractor for a more thorough inspection and maintenance service. Document all maintenance activities, including dates, descriptions of work performed, and any photos or videos taken. This documentation can be valuable evidence of your proactive efforts to maintain your roof, which can strengthen your position if you ever need to file a homeowner’s insurance claim for roof leak damage.